Servo Motors
Introduction
Servo motors allow you to make things move in a precise, repeatable way. If you’ve ever cracked open an RC car chances are you’ve seen one of them. They’re commonly used to control flaps, fins, and tire orientation in just about every kind of RC vehicle out there.
Parts
For this tutorial, you will need:
TowerPro SG90 Micro Servo 2pk
Breadboard & Jumper Wire Kit
Arduino Uno R3
Wiring
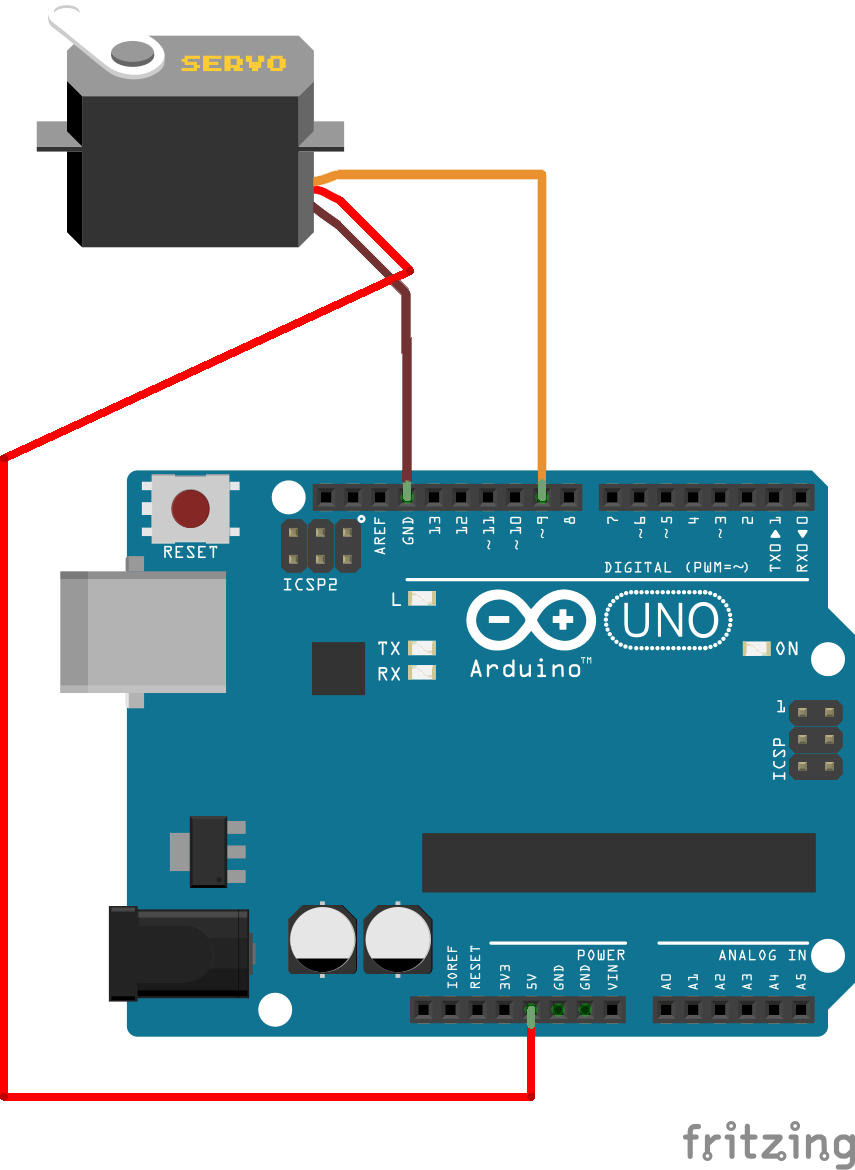
- Connect the RED (+5v) from the servo to 5V on Arduino.
- Connect the BROWN/BLACK (GND) from the servo to any GND on Arduino.
- Connect the ORANGE/YELLOW (DATA) to any of the ~PWM pins on Arduino (for example, digital pin 9).
Positional vs Continuous Rotation
Positional servos allow you to specify a position between 0° and 180° and the servo will move to that location and hold it.
Continuous rotation servos, on the other hand, are able to move a full 360°. Continuous rotation servos are controlled by specifying the speed and direction of movement, rather than the desired angle. A classic use case for continuous rotation servos is to drive the wheels on a robot. Moving both wheels at the same speed is important to keep the robot moving in a straight line, and turning can be achieved by moving each wheel at slightly different speeds.
Generally speaking, if someone is talking about a servo it’s safe to assume they’re talking about a positional servo.
Visualization
Adjust the slider below to see how the input signal’s pulse width affects the servo position.
Sample Code
Here’s the simplest program you could write. This program moves the servo to it’s center position (90°) and holds it there.

Let’s try actually making the servo move this time. Let’s make the servo sweep from it’s minimum position (0°) up to it’s maximum position (180°) and back again.
