HC-SR04 Ultrasonic Distance Sensor
Introduction
The HC-SR04 Ultrasonic Distance sensor is a low cost way to add distance detection to your projects. The sensor works by shooting out a sound wave, and then measuring how long it takes for the sound to bounce back to the sensor. If you need the parts to work on this project, you can purchase them below. Or skip ahead if you’re ready to go!
Parts
For this tutorial, you will need:
HC-SR04 Ultrasonic Distance Sensor
Breadboard & Jumper Wire Kit
Arduino Uno R3
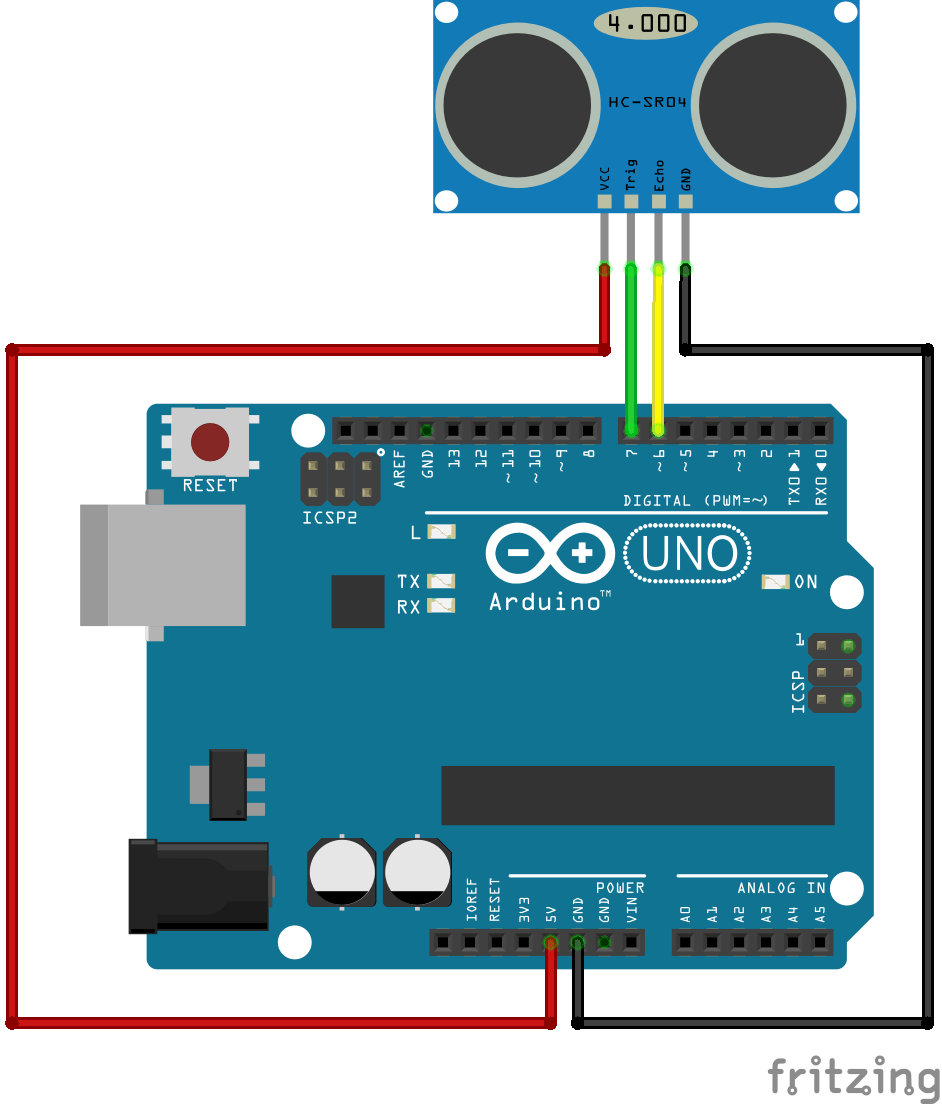
Wiring
- Connect VCC from the sensor to 5V on Arduino.
- Connect GND from the sensor to any GND on Arduino.
- Connect Trig to any of the digital pins on Arduino (for example, digital pin 7).
- Connect Echo to any of the digital pins on Arduino (for example, digital pin 6).
Sample Code
Writing all the code from scratch to work with one of these can be a bit intimidating, so we’ll use the MakerVision app to get a jump start. Here’s the simplest program you could write:
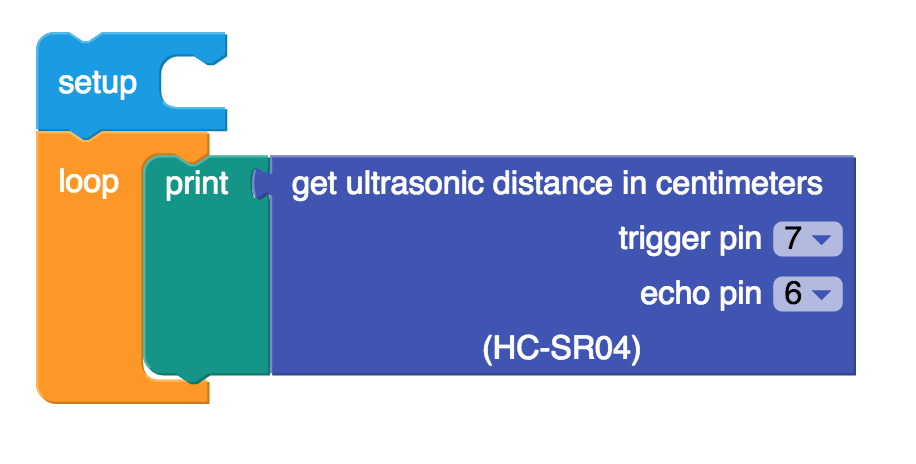
This program gets a distance measurement from the sensor, and then sends the value back to your computer over the Serial connection (USB cable). The value that’s returned to us will be the distance (centimeters) from the sensor to a large object in front of the sensor.
Digging Deeper
If you’re just looking to start using the sensor - congratulations! You’re ready to go! If you’d like to learn a little more about how it all works, keep reading.
How fast is sound?

That jet is flying just a tiny bit under the speed of sound, which is why you can see that vapor cone popping in and out around it. The actual speed of sound varies a bit based on environmental factors, but here on earth it’s usually right around 1234.8 km/h (767.3 MPH).
Four Pins
There are 4 pins on this sensor. The pins labeled VCC and GND require a 5-volt power source and a connection to a common ground, respectively.
The TRG pin is a trigger pin. It’s an input to the sensor. When we put a positive voltage on that pin, the sensor will emit a high pitched (~40khz) sound that’s barely audible to human ears. When we remove that voltage, it will stop emitting that sound.
The ECHO pin is an output. We can use our Arduino to see how long that pin remains HIGH. The pin will remain high a proportional amount of time to how long it took to receive the echo.
Math
Here’s the basic equation:
Note that we’re dividing how long it took you to hear the echo by 2, because we want the distance between the sensor and the object - not how far the sound had to travel. The sound has to travel from the sensor to the object and back again - twice the distance.
Adding in the speed of sound constant, we get:
Suppose you hear an echo 3 seconds after shouting: